Installing/VMWareFusion
From GalliumOS Wiki
< Installing
Revision as of 06:28, 29 May 2018 by Nbastin (talk | contribs) (Created page with "= Installing in VMWare Fusion Pro = ''Note: These instructions were written for the current 3.0 nightly builds, and Fusion Pro 10. Existing 2.1 builds (and future 3.0 produc...")
Contents
Installing in VMWare Fusion Pro
Note: These instructions were written for the current 3.0 nightly builds, and Fusion Pro 10. Existing 2.1 builds (and future 3.0 production builds) should work with Fusion Pro 8 with similar configuration changes for the hard drive.
The first step is to download the Broadwell installation ISO from the GalliumOS nightly release site.
Configure VMWare Machine
Basic Setup
- Select the option to make a new VM from the toolbar
- Choose the default Install from disc or image and click Continue
- Click the Use another disc or disc image... button and locate the ISO you have downloaded
- Make sure the ISO you imported is selected, and click Continue
- Scroll down in the right pane of the Operating System dialog and choose Other Linux 4.x or later kernel 64-bit
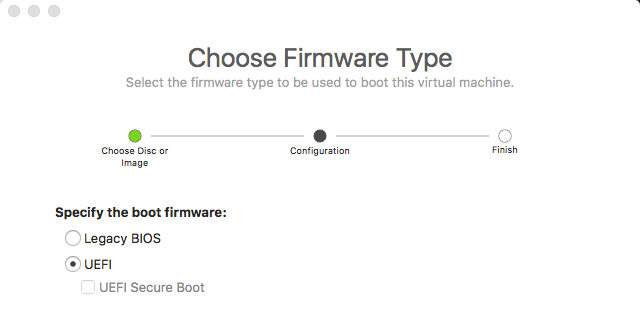
- Change the boot firmware to UEFI and click Continue
Note: You can use Legacy BIOS here, but using UEFI will generally lead to a better experience and will allow for screen resizing without having to manually install VMWare Tools
- Click the Customize Settings button on the Final screen and save the VM config
Settings Changes
- Click the Processors & Memory button and change the memory and CPU to your desired values, and click Show All to return to the settings pane
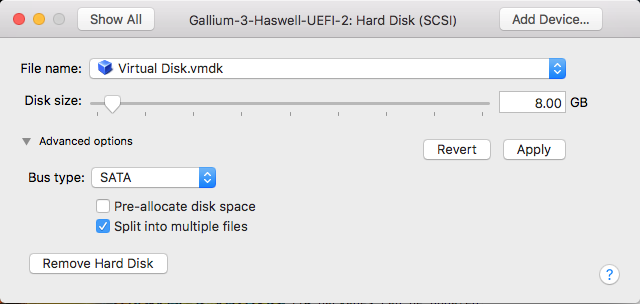
- Click the Hard Disk button
- Click the disclosure arrow next to Advanced options and change the Bus type to SATA
- Click the Apply button and then click Show All to return to the settings pane
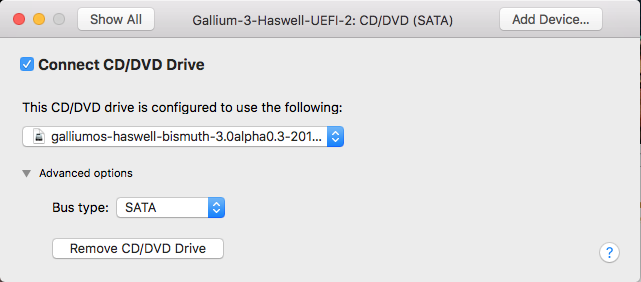
- Click the CD/DVD button
- Click the disclosure arrow next to Advanced options and change the Bus type to SATA


