Difference between revisions of "Installing/VMWareFusion"
| Line 55: | Line 55: | ||
* You can now close that window and double click on the '''Install GalliumOS 3.0''' icon in the upper left of the desktop | * You can now close that window and double click on the '''Install GalliumOS 3.0''' icon in the upper left of the desktop | ||
| − | |||
| − | + | The installer will walk you through the installation - choose the options that make the most sense for your environment. The defaults are fine unless you need to change your language, keyboard layout, or time zone. | |
| + | |||
| + | The installer will automatically eject the install media at the end of installation when you reboot the VM. You will need to hit ''Enter'' to proceed into your next boot after the install is completed and you have clicked the '''Restart''' button | ||
=== Networking Fix === | === Networking Fix === | ||
Latest revision as of 06:44, 29 May 2018
Contents
Installing in VMWare Fusion Pro
Note: These instructions were written for the current 3.0 nightly builds, and Fusion Pro 10. Existing 2.1 builds (and future 3.0 production builds) should work with Fusion Pro 8 with similar configuration changes for the hard drive.
The first step is to download the Haswell installation ISO from the GalliumOS nightly release site.
Configure VMWare Machine
Basic Setup
- Select the option to make a new VM from the toolbar
- Choose the default Install from disc or image and click Continue
- Click the Use another disc or disc image... button and locate the ISO you have downloaded
- Make sure the ISO you imported is selected, and click Continue
- Scroll down in the right pane of the Operating System dialog and choose Other Linux 4.x or later kernel 64-bit
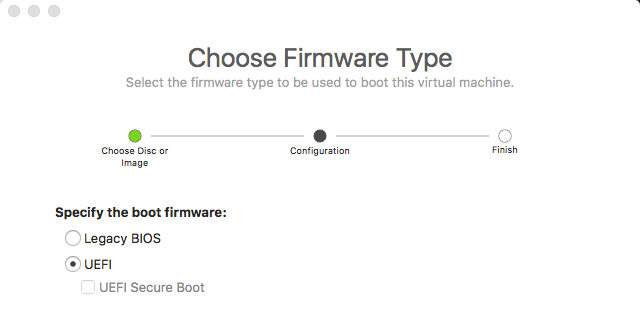
- Change the boot firmware to UEFI and click Continue
Note: You can use Legacy BIOS here, but using UEFI will generally lead to a better experience and will allow for screen resizing without having to manually install VMWare Tools
- Click the Customize Settings button on the Final screen and save the VM config
Settings Changes
- Click the Processors & Memory button and change the memory and CPU to your desired values, and click Show All to return to the settings pane
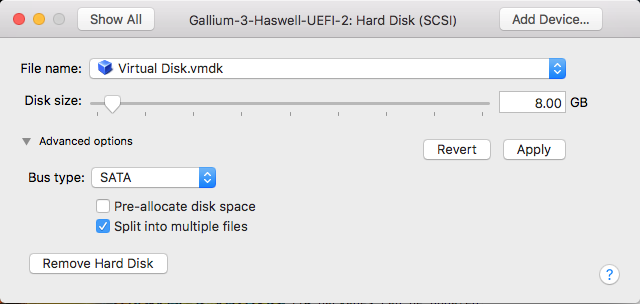
- Click the Hard Disk button
- Click the disclosure arrow next to Advanced options and change the Bus type to SATA
- Click the Apply button and then click Show All to return to the settings pane
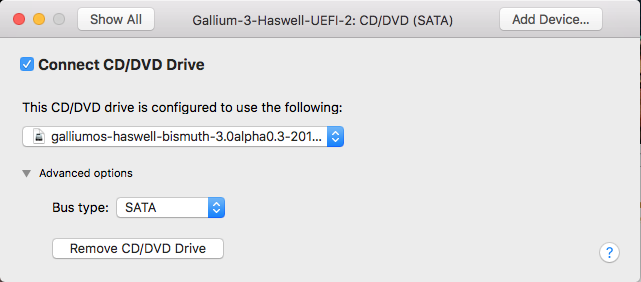
- Click the CD/DVD button
- Click the disclosure arrow next to Advanced options and change the Bus type to SATA
- You can now close all the settings, or configure other devices as you prefer (camera, bluetooth, etc.).
Boot the Installer
- Click in the VM window to boot your virtual machine
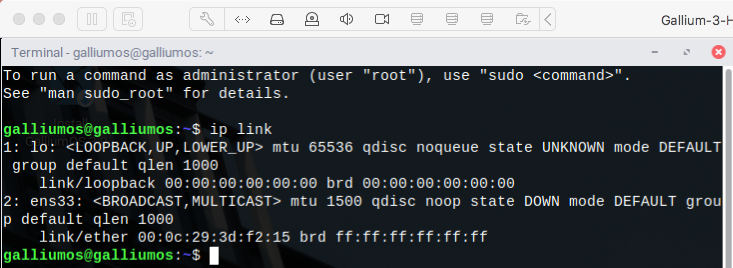
- Once the VM is booted, you will not have any network connectivity on your emulated ethernet interface
- Open up a terminal window using the toolbar at the bottom left of your screen:
- Run the ip link command to figure out the name of your ethernet interface (it is likely ens33, but you should check):
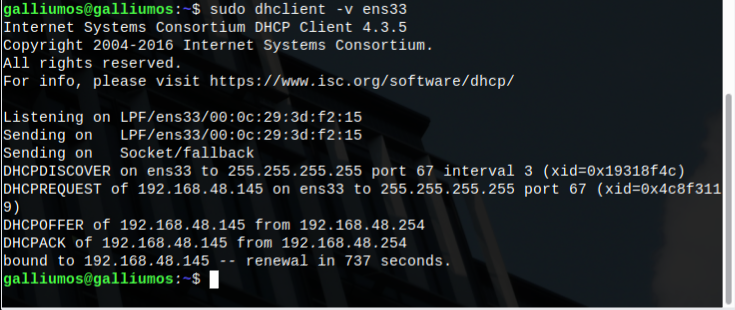
- Taking that interface name, now run dhclient to get connected:
- You can now close that window and double click on the Install GalliumOS 3.0 icon in the upper left of the desktop
The installer will walk you through the installation - choose the options that make the most sense for your environment. The defaults are fine unless you need to change your language, keyboard layout, or time zone.
The installer will automatically eject the install media at the end of installation when you reboot the VM. You will need to hit Enter to proceed into your next boot after the install is completed and you have clicked the Restart button
Networking Fix
You have now booted into a (mostly) working GalliumOS!
Your networking still will not be working by default:
To fix this problem, open a Terminal, and execute the following commands:
-
sudo touch /etc/NetworkManager/conf.d/10-globally-managed-devices.conf
-
sudo service NetworkManager restart
You will now have a working network, properly indicated in the UI:
