Difference between revisions of "Installing/VirtualBox"
| Line 38: | Line 38: | ||
[[File:Chosen-disk.png]] | [[File:Chosen-disk.png]] | ||
* Click '''OK''' and close the '''Storage''' customization dialog | * Click '''OK''' and close the '''Storage''' customization dialog | ||
| + | |||
| + | These settings will allow the Gallium Live ISO to boot and be installed. However, the installed OS will not have working video without the options below: | ||
| + | |||
| + | * Click the '''Display''' header | ||
| + | * Select the '''Remote Display''' tab | ||
| + | * Check the '''Enable Server''' box | ||
| + | [[File:Enable-VB-Display.png]] | ||
| + | |||
| + | You can change the settings in this pane as appropriate for your environment - the only requirement is that the server be enabled. | ||
| + | |||
| + | * Click '''OK''' and exit the ''Display'' settings editor. | ||
| + | |||
| + | === Boot the Installer ISO === | ||
| + | |||
| + | * Click the '''Start''' button in the toolbar at the top of the window | ||
| + | [[File:vbox-start.png]] | ||
| + | |||
| + | A number of overlay messages will show up on the screen, you may close those at any time. Once your ISO is booted you will see: | ||
| + | |||
| + | [[File:basic-boot-vbox.png]] | ||
| + | |||
| + | * Double click on the '''Install GalliumOS 2.1''' icon in the top left | ||
| + | |||
| + | The installer will walk you through the installation - choose the options that make the most sense for your environment. The defaults are fine unless you need to change your language, keyboard layout, or time zone. | ||
Revision as of 06:58, 28 May 2018
Contents
Installing in VirtualBox
Installation in VirtualBox is simple, but requires some special settings in initial VM setup to make sure that the hardware provided to the OS matches that which might exist in ChromeOS devices.
The first step is to download an installation ISO, available from the Gallium OS download site. The best option is to choose the Sandy / Ivy Bridge ISO, although some others may work.
Set up VirtualBox VM Profile
Basic Setup
- Select New from your VirtualBox UI toolbar
- If you see an Expert Mode button at the bottom of the window, click that now
- Set the name of your VM to anything you want
- Change the Type to Linux
- Change the Version to Linux 2.6 / 3.x / 4.x (64-bit) (These options may change in the future - use the similarly generic option)
- Set the Memory size to anything 1024 MB and above, as required for your development needs
- Select Create a virtual hard disk now, which should be the default
- Click the Create button
- The default settings of VDI and 8GB are fine for disk file location and settings
- Click Create button again
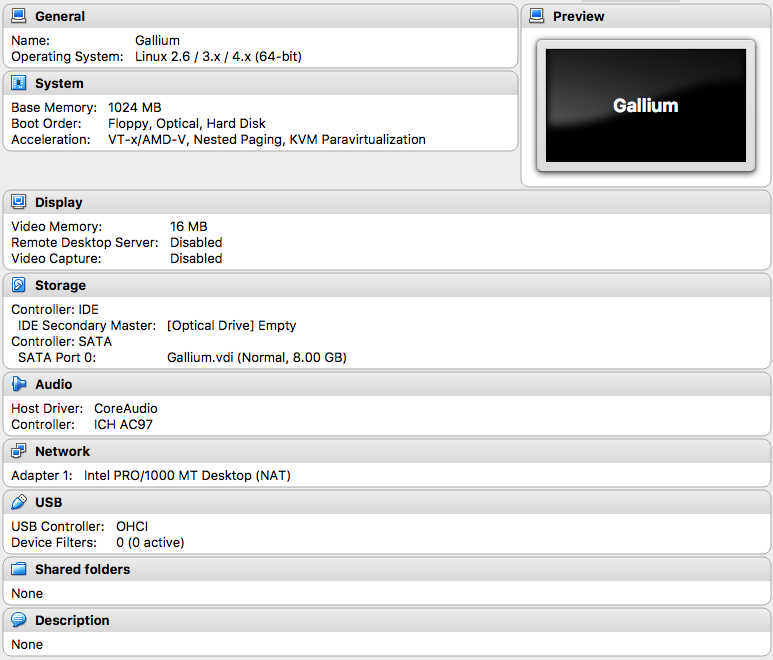
You should now have a profile that looks something like the image below:
Profile Tweaks
There are two important changes to make - one of which will prevent Gallium from installing, and the other will prevent it from working once you have installed.
In order to allow basic GalliumOS installation, you need to fix the optical drive to be attached to the SATA controller:
- Click on the Storage header
- Select the IDE controller line and click the icon at the bottom of the pane to remove the controller:
- Select the remaining SATA Controller line and click the icon to add an optical drive:
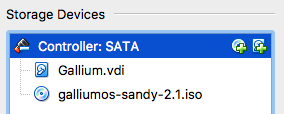
- Click the button for Choose Disk and select the ISO you have downloaded:
- Click OK and close the Storage customization dialog
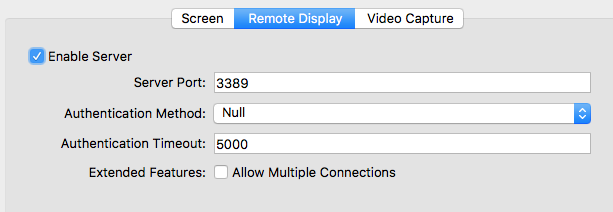
These settings will allow the Gallium Live ISO to boot and be installed. However, the installed OS will not have working video without the options below:
- Click the Display header
- Select the Remote Display tab
- Check the Enable Server box
You can change the settings in this pane as appropriate for your environment - the only requirement is that the server be enabled.
- Click OK and exit the Display settings editor.
Boot the Installer ISO
- Click the Start button in the toolbar at the top of the window
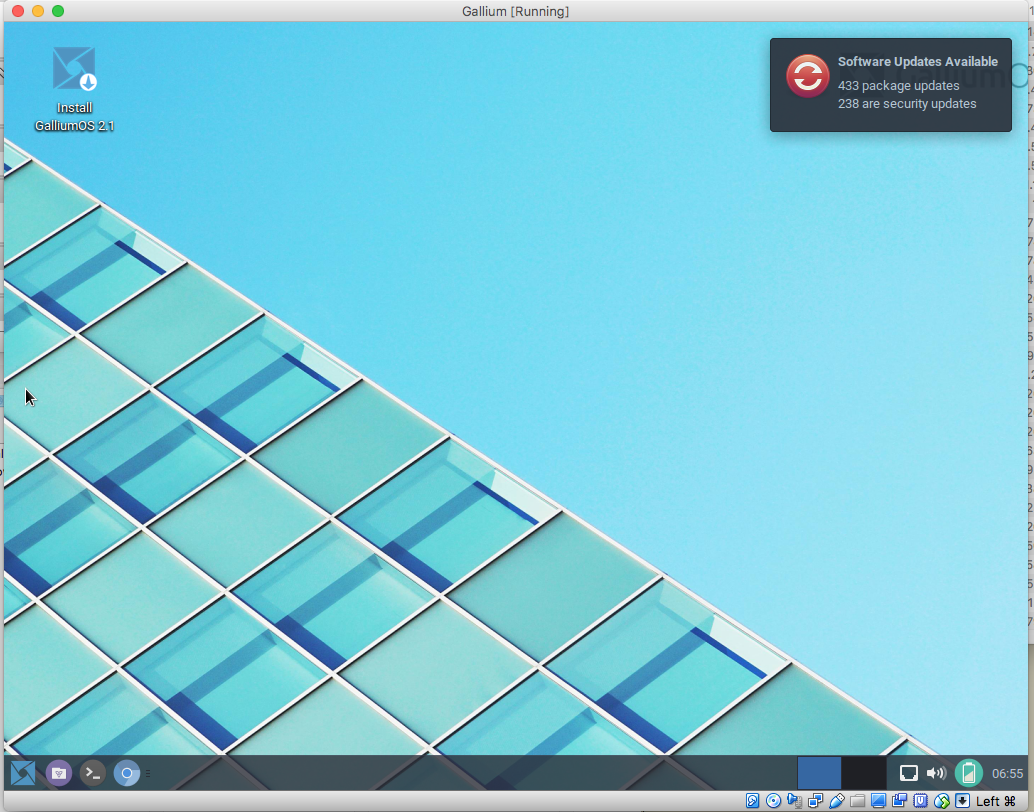
A number of overlay messages will show up on the screen, you may close those at any time. Once your ISO is booted you will see:
- Double click on the Install GalliumOS 2.1 icon in the top left
The installer will walk you through the installation - choose the options that make the most sense for your environment. The defaults are fine unless you need to change your language, keyboard layout, or time zone.


